
Okay, so you’ve heard about the harvest moon , that big, beautiful, and often slightly orange orb that graces our skies around autumn. But what’s the deal with photographing it? Why does everyone suddenly become an amateur astronomer with a camera in hand? Let’s dive deep – not just into the how-to, but the why behind the craze and how to actually capture a stunning harvest moon image that’ll make your Instagram followers swoon.
Why All the Harvest Moon Hype?
Here’s the thing: it’s not just about pretty pictures. The harvest moon has a rich history. Traditionally, it’s the full moon closest to the autumnal equinox, the moment when day and night are nearly equal. Farmers used to rely on its extra light to extend their working hours during the harvest season. It’s that simple. The harvest moon’s significance stems from its practical use. It allowed for longer workdays , ensuring crops were gathered before winter set in. But beyond the practical, there’s something almost primal about looking up at that giant, glowing disc. It connects us to nature, to history, and to each other (because let’s face it, everyone’s looking at the same moon!).
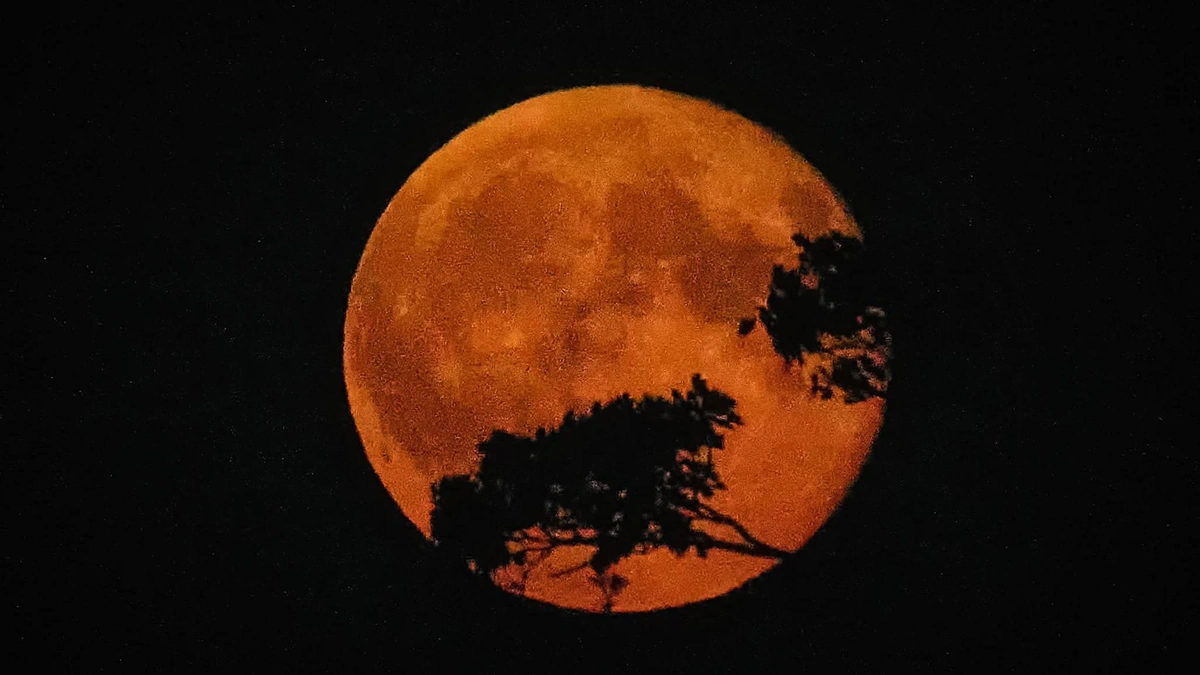
Now, why does the harvest moon sometimes appear more orange than other full moons? It’s all about the atmosphere! When the moon is low on the horizon, its light has to travel through more of the Earth’s atmosphere. This scatters away the blue light, leaving the red and orange hues to dominate. Think of it like a sunset, but with the moon! The amount of pollution or dust in the air can also influence the harvest moon color . So, a particularly hazy night might result in a seriously vibrant orange moon.
Gear Up | What You Need to Capture the Magic
Don’t think you need a super-expensive telescope-mounted camera to get a great shot. While fancy equipment helps, you can achieve impressive results with gear you might already own. A DSLR or mirrorless camera with a decent zoom lens (at least 200mm) is a good starting point. A tripod is absolutely essential. Trust me, you’ll need the stability, especially when shooting at slower shutter speeds. And finally, a remote shutter release (or your camera’s self-timer) will help prevent camera shake.
But here’s the kicker: it’s not just about the gear. It’s about understanding how to use it. Learn the relationship between aperture, shutter speed, and ISO. Experiment with different settings to see how they affect your image. A common mistake I see people make is shooting in automatic mode. You will want to adjust things like the aperture for moon photography . Moon photography requires manual settings to get it just right! And don’t be afraid to crank up the ISO a little if you’re struggling with low light. Just be mindful of noise (graininess) in your images.
Location, Location, Location | Finding the Perfect Spot
This is where things get interesting. You don’t just want a clear view of the moon; you want a compelling view. Think about foreground elements that can add depth and interest to your photo. Silhouetted trees, buildings, or even people can create a dramatic effect. Scout your location ahead of time. Use a photography app (like PhotoPills or PlanIt!) to track the moon’s path and plan your shot accordingly. I initially thought any open field would do, but then I realized how much difference a well-placed tree makes!
Consider the moonrise time in your area. The moon will appear largest and most orange when it’s close to the horizon, so that’s the prime time to shoot. And don’t forget about light pollution! City lights can wash out the moon, making it appear less vibrant. Try to find a location away from urban areas for the best results. Dark sky areas are ideal, but even a short drive out of town can make a big difference.
Mastering the Settings | Exposure and Focus Tips
Alright, let’s get down to the nitty-gritty. Here’s a starting point for your camera settings:
- Aperture: f/8 to f/11 (for sharpness)
- Shutter Speed: Start around 1/125th of a second and adjust as needed.
- ISO: 100 to 400 (to minimize noise)
But remember, these are just guidelines. The best settings will depend on the specific conditions and your equipment. Use your camera’s histogram to check your exposure. You want to avoid clipping (overexposing) the highlights, which will result in a blown-out, featureless moon. And here’s a pro tip: focus on the edge of the moon for the sharpest results.
What fascinates me is how much post-processing can enhance a harvest moon photo . But don’t overdo it! Subtle adjustments to contrast, brightness, and sharpness can make a big difference. And if you shot in RAW format (which you should!), you’ll have even more flexibility to tweak the colors and tones. Experiment with different editing techniques to find your own style.
Beyond the Moon | Adding Context and Creativity
Look, a photo of just the moon can be beautiful. But a photo of the moon in context can be truly captivating. Think about the story you want to tell. Are you capturing the moon over a bustling city skyline? Or a serene rural landscape? The foreground elements should complement the moon and add to the overall narrative. Try capturing the moon’s glow reflecting off of the landscape. This is also a great way to introduce new elements in the photo. Experiment with different angles and compositions. Don’t be afraid to get creative!
And here’s a thought: try shooting a time-lapse of the harvest moon rising. It’s a bit more involved, but the results can be stunning. You’ll need a tripod, an intervalometer (a device that triggers your camera’s shutter at set intervals), and some patience. But trust me, watching the moon slowly climb across the sky is an experience you won’t soon forget. Plus, the resulting time-lapse video will be seriously impressive.
FAQ About Harvest Moon Photography
Frequently Asked Questions
What’s the best time to photograph the harvest moon?
As the moon rises or is highest in the sky. The specific time varies, so check a moonrise calendar for your location.
What if I don’t have a fancy camera?
You can still get decent shots with a smartphone! Use a tripod (or prop it up against something stable), and experiment with the zoom and exposure settings.
How do I avoid blurry moon photos?
Use a tripod, a remote shutter release, and a fast shutter speed. Also, focus carefully on the edge of the moon.
What are some good foreground elements to include?
Trees, buildings, mountains, or even people can add depth and interest to your photos.
How important is post-processing?
Post-processing can enhance your images, but don’t overdo it. Subtle adjustments to contrast, brightness, and sharpness are usually enough.
Can weather impact my results?
Yes, clouds, fog, and pollution can all affect visibility. Clear skies are ideal, but even a partly cloudy night can create interesting effects.
So, there you have it. Photographing the harvest moon is more than just pointing and shooting. It’s about understanding the science, mastering the settings, and finding the perfect location. But most importantly, it’s about connecting with nature and capturing a moment of beauty. Now get out there and start shooting! Just remember to enjoy the view – even if you don’t get the perfect shot, the harvest moon is always a sight to behold.

